Showing posts with label Chronicles of a Country Girl. Show all posts

Thursday, October 27, 2011

Beauty in the Breakdown


I'm so glad you all enjoyed hearing about my new camera bag in the last post.  I'm in no way affiliated with Kelly Moore but wanted to give a shout out to a great company.  I hope that those of you who said you might be looking for a good camera bag will have the opportunity to own one, I know you will love yours as much as I love mine!

This week is one of those crazy weeks where you have a list of emails, phone calls, and appointments that stare you down each morning when you wake up.  I am slowly addressing each of those, but there never seem to be enough hours in the day.

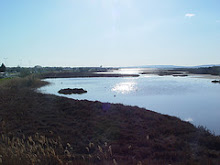
When I feel buried by "real" life stuff, I sometimes do the complete opposite of what I should be doing, and veer off into projects that could wait...like playing around with photography.  I blame people like Kate for this, since she always posts such gorgeous pictures, both her own and those of others, on her blog.  In a recent post she included some amazing images from flickr and one of those was a still life that was breathtaking.


I've been enamored with still life photography for a long time, really since the first time I stumbled upon an example of it in a cookbook of all places.  I've longed to recreate what Dutch Masters of old captured in their paintings, the subtle use of light and shadow, vivid colors, and an almost 3-D quality that draws the viewer in.

The people who are really good at this type of photography make it look amazingly easy, but it is not.  It takes more than a simple knowledge of photography, there are also things like lighting, angles, and most importantly...composition to consider.  The end result should draw the eye to one primary part of the image, similar to having a star of a show, and the other pieces are simply supporting characters meant to create a sense of place and scene.


Texture and background are also important, and I've used a variety of textures, mostly by Florabella and Kim Klassen.  If you haven't signed up for Kim's very generous and always lovely free textures, you really should.  

I think that to really become a master at creating images that resemble artistic master paintings, it wouldn't hurt to have a background in art, which I am sorely lacking.  I feel like artists have an innate sense of composition, color, and lighting, which are all things I have to study and think about.  The other key ingredient is to have the proper lighting equipment.  I've been fortunate to find used lighting equipment (a soft box is a must when you are starting out with still life photography) through friends and contacts who were getting out of the business.  Lighting is crucial in creating the look you want in the finished image.

The process of breaking down an image has become a key element and driving force behind taking my photography to the next step.  If you surf the web enough and stare at enough photos you begin to see the way certain images come into being.  From there you can create your images using your own sense of style.


Although there were other things I should have been doing, this wasn't really a waste of time, I will be adding them to my portfolio on my website, so it was kind of like doing work! ;-)

And speaking of beauty in the breakdown, the wonderfully wise A-M posted an article about decluttering (you can read it here) on the very day I had done some decluttering of my own.  Having 7 bins, yes I said 7, of fall, Halloween, and Thanksgiving decor was feeling like a wee bit too much...well that and the fact that Mr. Tide snidely said, "so...fall is your favorite time of year?...because you have more bins for it than you have for Christmas!"...so I knew it was time.

I've always been someone who goes through my things regularly and gets rid of them.  Moving 6 times in 7 years when we were first married makes you appreciate the notion of packing light.  But even though this house is much smaller than our last, and we did get rid of a ton of stuff when we moved, I've been a bit neglectful about taking stock and getting rid of things as frequently as I once did.  Throw in the fact that my parents both passed away and so I inherited a lifetime's worth of their stuff to boot, and well, things had gotten little out of hand when it came to my holiday decor hoarding.

So I sat there in my living room, surrounded by tubs full of stuff, some of which we had had since we first got married, and some of which my parents used to decorate their own home, and it hit me like a ton of bricks.  Right then and there I broke down...something I almost never do!  Mr. Tide came to see what was wrong, and I blubbered and sputtered about how it was just hard, getting rid of things that held memories from a simpler time.  He of course told me not to get rid of the stuff if it made me sad.  I explained that I was ready, it's a complicated emotion, but that it was just hard letting go.

By the time I got my shower and we loaded up the huge bin (I emptied 3 bins total) to take to the donation place I was fine...I felt lighter really, like a weight had been lifted off of my shoulders.  So when I read the article linked above I knew I had made the right decision, I was ready to get rid of something old to welcome something new into my life...a little breathing room perhaps!  So there really is Beauty in the Breakdown, and sometimes it's best to Let Go!

If you would like to learn more about creating Still Life Photos, click HERE


Thursday, February 24, 2011

Whisk Kid

(All photos courtesy of Whisk Kid)


Hi everyone, thanks for your sweet comments about my article coming out in Country Sampler.  Although I've been freelance writing about homes and photographing for regional magazines for the past 12 years, it's still thrilling to me to see my name in print for my writing or photos in the national mags!   So thanks for letting me be all about "me" for a post or two!

Today I'm not really thinking about food, I have a flu bug that my dear husband decided to share with me, but I have been wanting to share something myself for awhile about someone who is a master of food.


Do you remember being 19 or even 20 and what you were doing?  I was spending my days playing tennis at college and wishing I could skip the whole class part and simply hit the courts 24/7.  I lived in an apartment that had a microwave, 2 tiny burners, and no oven.  I considered it a gourmet meal if I slapped some store bought roast beef between two slices of bread and cut up a piece of fruit to go along with it.  And as I recall, Domino's Pizza lost a lot of money on us with that "delivery in 30 minutes or it's free" rule.

At 19 or 20 most of us are in college or starting our first big job, busy just making ends meet and not really thinking about a whole lot more than what needs to be done that day...at least that's how it was for me.  But for one Michigan university student, she has her eye on the prize!


While I was busy worrying about what to wear for a weekend date at her age, she's busy creating this!!!  You see, Kaitlin, also known as the Whisk Kid, has a dream, and one I fully expect her to attain.  She hopes to one day own her own bakery.  


"I'm a marketing major, and I'm hoping to open a bakery after I graduate," says Kaitlin when I emailed her to ask why she wasn't styling food for the likes of Martha Stewart or any other national magazine who wants to feature yummy as well as gorgeously presented food!


One of the things I love most about blogging is the spiderweb effect it has and how you can start one place and end up finding the most wonderful things as you wind your way along the spiderweb.  That's how I found Kaitlin.  

I had read on Kate's blog about a food photography challenge over at Pioneer Woman's site and so off I went to visit the photostream on Flickr to enter a picture and look at all of the other wonderful entries.  It's quite addicting really, flipping through pages of beautiful food shots and I was instantly struck by the photo above of homemade ice cream.  It was one of Kaitlin's photos...as are ALL of the photos in this post.  You see it wasn't just a picture of homemade ice cream in a bowl, it was a picture that said it's summertime y'all and the heat wave is upon us so come onto the big back porch, grab yourself a big 'ole glass of lemonade and enjoy this cold refreshing bowl of ice cream!  Yup, it really said all of that to me with just this one photo.


I was intrigued, so I went to Kaitlin's profile page expecting to find a link to a professional photographer's website, but instead it took me to her great blog Whisk Kid.  When I read the "about the kid" section in her profile I was floored.  She was a college student, cooking in a tiny and very dated apartment kitchen...the one you see above actually!  And she shoots with the same Canon Rebel XTi that I use, but I've never taken a food photo that looked like hers!  

So I emailed her and asked how on earth she does it, baking in a tiny apartment kitchen with only the counter space you see in the picture above?!  She was so sweet and replied by telling me that she was a college student studying marketing and about her dream of one day owning her own bakery.  "I do bake in my apartment, but it's ill-equipped (I have approximately 1 1/2 square feet of counter space) so I often bake at my boyfriend's apartment, which has a larger kitchen."  But we all know that most college town apartments are not equipped with a gourmet cook's kitchen so I'm still over the top impressed!  And can we say lucky boyfriend?!


Kaitlin clearly has a talent for baking, just look at these vegan cupcakes she made in the photo above, but what strikes me as really amazing is her ability to stage and photograph food.  Take a look at a few of her wonderful and oh so mouthwatering photos...


She even makes Pop Tarts look inviting!


And she's no one trick pony, she also makes wonderful main dishes, but her real love can be found in her baking.


Along with providing wonderful recipes on her blog, she also gives her readers helpful hints on how to create these delectable desserts in their own homes, including step by step instructions on things like how to frost the perfect cake! 


But even with Kaitlin's wonderful instructions, I'm betting I couldn't recreate many of her beautiful desserts. 


And it's not just her recipes and instructions that are so wonderful, her writing is great too!  I'm just so glad I found her beautiful and inspiring blog, and I wish Kaitlin all the success in the world with her college career as well as her dream to become a bakery owner once she graduates.  I think we'll all be seeing more of Kaitlin in the future.  I think any magazine that would give her a chance on doing food styling would not regret it for a minute!

Thanks Kaitlin for letting me use your wonderful photos and for allowing me to share your story with my readers!  Best of luck in everything you do!  And to see more of Kaitlin's great food, click HERE to visit her blog!


Spread the Love...

Mom's Good Recipes  (so funny this was picked at random and it's a food blog!)

Molly Glover

33 Shades of Green  (ok, this is freaking me out a little, this one has a post up right now with a link party about food!  Apparently the universe is guiding me to food blogs for my random shout outs today!)

Monday, January 17, 2011

Texturize Me


This past weekend, when I should have been vacuuming and dusting, I was busy doing fun things instead.  We took little Misty Belle out to a local boardwalk and her favorite pet store to get some treats.  We wanted to make sure she is getting continued socialization, which isn't easy to do during the cold winter months!  There were a few other brave souls roaming the boardwalk who ooh'd and ahh'd over her and we even saw another darling puppy, a boxer and I thought of Di, The Blue Ridge Gal and her sweet boy Rowdy.


On Saturday I opened an email from Kim Klassen that had links to 2 free textures.  Mr. Tide had taken the dogs out very early on Saturday morning, so when I showed him the new textures he said he had taken some pictures at sunrise if I wanted to try and add a texture to them.  Of course, when given the choice between cleaning or playing around in Photoshop, y'all know which one will win every time!!!


Here's another one of Mr. Tide's sunrise photos overlooking our icy creek.  I applied a Florabella action called Worn Linen, which gives the photo a nice canvas texture. 

It seems that everyone has been in a bit of a texture mode these days in blogland.  If you pop over to the beautiful blog Dear Lillie, you'll see some gorgeous shots using textures, not to mention a slipcovered ottoman that I covet!!!


Kate was also feeling the texture love this weekend and created some beautiful photos of her own, using free textures she found on Flickr.  I did a bit of hunting around on Flickr too, and found this gorgeous Old Paper Texture for free and applied it to my pear photo.


I love the beautiful french script from Sophie G*'s Postcard 3 texture which I found thanks to Kate.  And the best part is most of these lovely textures are available for free and with limited restrictions on personal or commercial use.  You should always check the terms of use when creating things using someone else's textures though, as there can be restrictions on how you can use them or if you can use them on things you intend to sell, such as prints or note cards.


Some of you have asked what a texture is, and in actuality the answer is really quite simple, they are jpeg photos.  These jpeg photos can then be applied as a layer to your existing photo giving it a whole new look and feel.  They can be created through the use of photo editing programs from scratch or you can simply create one by taking a photograph or scanning something like a piece of fabric or an old postcard and turning it into a jpeg.  The possibilities are really limitless when it comes to creating textures, the sky's the limit!

I decided to play around with creating some of my own, because once you create the jpeg you can then apply it to your photos and play around with the lighting, color burn, etc. to make it just the way you want it.  In the photo above I scanned an old lace handkerchief that belonged to my grandmother and created two different textures using the same photo, one with a very cool color cast, and one with warmer tones.  You can download them both for free and use them however you want by clicking HERE.


You can also apply more than one texture to a photo in order to create something really special if you want.  Above I used my Vintage Lace Cool Texture with Kim Klassen's Random Inspiration's Texture, in order to create an almost watercolor like effect.  I love this one!


On this last photo I again used the Vintage Lace Texture I created along with the same beautiful Postcard 2 texture that Kate had used on her photo, which you can see by clicking here.

I love that people create and share their textures, whether they are free or for a small fee, because they really do change the whole look and feel of any photograph.  I also hope that some of you will try downloading  these various textures and play around with this yourself to create whatever your heart desires!


One last thing.  Over the weekend I received  Stylish Blogger Award from the very talented Cathy at Stitchfork Designs.  If you've never popped by her blog, be sure to stop by because Cathy does beautiful monogram and embroidery work!!!

With this award I'm supposed to tell you 7 things about myself and then pass it along to 10 other bloggers I admire, but you all know there are WAY more than 10 bloggers I admire.  So if you want to play along, please consider this an open invitation to do so...I'm sending this award out to all of you talented bloggers out there in blogland!  All you have to do is create a post telling us 7 things about yourself.  Of course if you're one of those organized people who can narrow it down to 10 other bloggers, be sure to create links to their blogs and then let them know you've sent them the award.

So here are 7 Things you may, or may not know about me.

1.  I often blog or write stories while in my PJs or sweats...it helps get the creative juices flowing!

2.  I was voted class clown by my high school's graduating class.

3.  I was a political science major in college and planned to go to law school after graduation.  During my summers I worked for lawyers and realized that the really successful attorneys had nice homes, boats, and cars, but were rarely ever home to enjoy those things or their families.

4.  Even though I studied politics in college, I hate discussing politics with anyone other than my immediate family.

5.  Throughout my life I've had more male friends than female.  I could talk cars, I played sports, and I hung out mostly with guys...and still do.

6.  If I could have a superhero talent it would be the ability to fly...wouldn't that be so cool?

7.  If I won the lottery I would give to various charities, I would pay off my house, put some in a trust for my children, and use the rest to travel all over the world.   I would not use it to build a big huge house or buy an expensive car.

Happy Monday my friends!

Friday, January 14, 2011

Humble Pie and Other Goings On


The very talented Kate from Chronicles of a Country Girl often enters her beautiful photos into the photo assignments challenges on Pioneer Woman's site.  Kate was even a finalist in a recent contest with her gorgeous cardinal photo, a well deserved accolade when you consider the hundreds of thousands of people who enter each of these photo assignments!  It really is quite intimidating and awe inspiring when you see some of the photos which get submitted each time.

I finally got brave enough to put one of my photos out there, the pear picture above, since this round's assignment is all about Food.  You can click here to see some of the finalists so far.  You might think that photographing food would be a piece of cake...sorry, pun intended, but it's actually quite hard.  Shooting in sunlight is a must, not getting too close, yet close enough to your food is important, and motion is also a good thing for food shots, like pouring something, etc.

Of course I did shoot my pear in bright sunlight, probably too bright actually, but hey it was my first attempt with these assignments and after seeing the competition I was served a big 'ole slice of humble pie...perfectly lit, expertly composed, and mouthwateringly beautiful of course.  There is some serious talent out there people, and just scrolling through all of those photos is enough to make a person want to pack away their Kodachrome and pull the covers over your lens.  But I won't do that, instead I'll study the winning photos and take heed of all their subtle tricks which take a peanut butter and jelly sandwich and turn it into a masterpiece.  Hmm, I seem to be talking a lot about food in posts lately don't I?!


Feeling slightly deflated and very much inadequate after viewing some of the photos in the contest, I did pick my chin up long enough to visit a few photo streams on Flickr of those whose photos I envied.  I came across one person's stream, which I have since forgotten their name because that's how many photos I looked at, and she had the most beautiful textures on many of her photos.  I'm talking drop dead, stop you in your tracks gorgeous textures.  Words gracefully blended with flowers, they had me at hello!  So I decided to crack open my photo archives from last spring and buy myself some textures, you know as a way of making myself feel better.


The textures I used on each of these photos are all from the very talented Kim Klassen.   Although the textures I used weren't free, they were all very reasonably priced I felt, and if you sign up to be on Kim's email list she often sends out freebies for folks like you and me to try.


I purchased a total of 10 textures, for $20.50 which I thought was fair, and after applying them to some of my flower photos from last spring I was convinced that if I ever decide to sell art prints or create note cards, these will be my "go to" textures!

The two pictures above both feature Kim's Layers Texture, I adjusted the lighting, the color burn, and erased a bit of the texture in the top cherry blossom picture so you can see that the same texture can be applied in a variety of ways to create very different looks.


On the photo above I used Kim's All My Lovin' texture, I love the mix of type written words, script, and music found in this texture. 


I also purchased a set of textures called The Vintage Collection.  I combined several textures from this set to create the photo above.  I love how some of the textures in this set give a subtle lace like quality to the photo and subject matter.


This last photo is my very favorite out of the group I created.  I used the All My Lovin' Texture once again and I simply adore the juxtaposition of the sweet sentiments with the delicate cherry blossom buds.  I actually think something like this would be so pretty for non-traditional wedding invitations or even bridal shower invites!

I want to thank Kim, who up until today I'd never really known much about, and had never used any of her textures.  She truly is a gifted artist and a very giving person.  We exchanged a few emails this afternoon and she was more than helpful in answering all of my questions regarding the compatibility of her textures for Photoshop Elements, which they are, HOORAY for me!  She also offers some great videos on her site to teach you how to use her textures and to help you take better photos!  She jokingly told me that this texture thing can become quite addictive, and I have to say that with these textures and others I'm planning to purchase from her, I may be in need of a 12 step program very soon!

You might have noticed that my watermark has changed too, I'm now using the name Kat W. Photography, not just Low Tide High Style.  I've decided that it's time to take off my training wheels and get serious about this photography stuff, so we'll see where it takes me, but for now I'm enjoying the ride, and I have you all to thank for constantly giving me support and encouragement...thank you!

I want to say thank you to those of you who have been brave enough to send me your house photos, if you missed it, read this post, and there is no time limit for submitting pictures, so keep them coming!  I wish we could feature single rooms, but right now we're looking for whole houses.

And also, there is still plenty of time to enter my latest Giveaway, click HERE to find out how to enter.

I hope you each have a wonderful weekend!

Sunday, January 2, 2011

Stepping Outside The Box


Today I read THIS post over on Laura's Blog, White Spray Paint, where she was singing my photography praises and wondering why she can't get the results she wants with some of her own shots.  This got me thinking about photography, and pictures in general.

On New Year's day, I decided to finally try out my new studio lighting equipment (It's White Lightning recommended by my good friend Gary!) that I got for my birthday in early December.  I had really wanted this lighting equipment, yet there was a part of me that was terrified to try it for the first time.  I wanted to try my hand at portraiture, but taking photos of people is much different than shooting inanimate objects that you can pose and have stay still for long periods of time.

And let's face it, dogs don't count, because for the most part dogs, and pets in general are pretty darned cute so it's hard to miss when shooting puppies!

My daughter volunteered to be my test subject for my lighting trial run, and Mr. Tide helped me set everything up since he has more technical knowledge about photography.


Each set of shots has 2 of the exact same shots, but they have very different post production techniques applied to them.  When I did the first round of each photo, I was pretty happy with how they turned out, but I just thought they were missing that "finished" look that some photographers seem to be able to capture and create.

I really wanted that look too, and thanks to a few emails from Kate, of  Chronicles of a Country Girl, I found my magic bullet so to speak!  She suggested I use a TRA re-touching action, not because my daughter needs wrinkle removal or major changes, but because it gives you the polished professional look that I was longing for from my photos of people.  I wanted my photos to not be fake representations of the person I'm shooting, but I wanted them to speak to me, to draw people in, and well, sometimes that means a little re-touching!

Unfortunately TRA's re-touching actions only work with full on Photoshop and all I have is Photoshop Elements 9 (which I highly recommend by the way!).  So off I went to do a Google search to find a re-touching action to work with the program I had.

I found just what I was looking for at MCP Actions' website in the form of a package deal called Amazing Faces Photoshop Actions, which is also compatible with Elements!!!  It's not free, it's on sale for $79.98 at the moment, but for someone like me who hopes to do some portrait photography in the near future I thought it would pay for itself fairly quickly.  After seeing the results, I'm convinced that it will not only pay for itself but that it will give me the oomph I've been lacking in my photos of people.  Now please understand that I'm not affiliated with or get compensated in any way, shape, or form by MCP Actions, I just like their stuff!


This photo is a great example of what I've been able to do with free actions up to this point.  I used free actions from Pioneer Woman to turn this photo into a black and white photo that has an edge burn.  I really like how this turned out...but...I really wanted to take my pictures to the next level, like the pros do.

And the photo below will show you what I mean...


Now, I know it's hard to compare apples to apples when the first photo is done in black and white and this one is in color but bear with me on this.

With this photo I used several actions from the MCP set I purchased.

1.  I used Eye Doctor to whiten the whites of my daughter's eyes, to highlight the white "touch lights"...those little white flash dots that draw you in to the eye.  And I darkened her pupils and lashes just slightly.  I actually didn't change her eye color, those other little tricks did everything I needed to highlight her beautiful eyes without making her look different or fake.

2.  I used the Dentist action, but instead of whitening her teeth I used an action called clean the teeth and polish the teeth which don't change the color really, but make them sparkle more...don't ask me how they do it, but it works!  Of course I did all of this with a very light hand so to speak, another tip from Kate, so that I didn't end up with someone who doesn't resemble my daughter.  It's her, just slightly more dramatic as you can see compared to the earlier shot.

3.  The last thing I did was to use an action called Magic Skin to even out her skin tone, and then Powder the Nose to help smooth out her skin, notice the smoother chin.  Both of these were used sparingly as well but what a difference these little things can make for how a photo turns out!

4.  For the final touch I cropped the second photo which brings the focus in on my daughter's face.


This one is un-retouched with Sepia tone added.  I often used Sepia or Black and White to help hide slight imperfections in a photo.  Although these look cool, it often distracts from the subject, I think, which is why I was thrilled with the other photos where I used MCP  re-touching Actions.


Re-touching can be mis-used to slim people, change eye color, etc. but all I wanted to do was to have photos that were real representations of my subject, just with a little minor tweaking and MCP has allowed me to do that now!!!

So this brings me back to Laura's post today.  Sometimes it's not just the camera, (although I love my Canon Rebel XTi) that makes a good photograph.  Sometimes you just need that little helping hand that you can only get from post production of your photos that takes a good photo and makes it a more memorable one!

Play around with this stuff, have fun, and try whatever you want to change your photos and make them what you want them to be.  It's one of the great gifts of digital photography, and I'm just thrilled that I live in a time when I can take full advantage of it!  There is no RIGHT way to take a picture, just take them, play around with the results, and learn as you go!

Saturday, October 23, 2010

Unplugged, Watermarking and A Winner


Thanks everyone for all of the lovely comments you left about the house I posted yesterday, it truly is a very special house!

This weekend, I plan to be unplugged, no blogging or computers, and just enjoy some beautiful fall weather and get some things done around here.  I've been so busy working on stories that I haven't had time to come up for air lately so I need a break.  But I promise I'll be back and I will reply to the great comments you left, at least those that will allow me to...sadly for some of you I still get the dreaded no-reply thing when I try and email you back so I have no way to respond.. :-(


I was recently asked to explain how I watermark my photos.  I use Photoshop Elements 9 currently but have used PS Elements 8, and PS Elements 2 (yes I was a little behind the times) prior to that.  In each of them you are able to click on "File" then click "Process Multiple Files" and a screen will come up that will allow you to pick a font, the opacity of that font, the size, what color you want it to be, and where on the photo you want it to appear.  There will also be a blank box on the right side which will allow you to type in what you want your watermark to say...ie. mine is Low Tide High Style.


I import fonts by downloading them from free sites such as 1001 Free Fonts, and several other sites.  If you do a Google search, you will find lots of free fonts on the web to use.  Once you download them and install them, they will automatically appear in Photoshop Elements (PSE) the next time you start it up.  If you download them while the program is running you will have to shut down PSE before they will show up in your fonts list.  

Because PSE lists the fonts alphabetically, it's good to try and remember the names of the fonts you've downloaded so that you can easily find them when you want them.  There are other ways to create really cool watermarks, or place them in different areas on a photo, but I'm still learning that technique...so I'll have to get back to you that one, maybe in a few years! ;-)


I was pretty proud of myself today though.  I actually learned how to download and install a few free actions from The Pioneer Woman's site!


Actions are things that allow you to do lots of photo editing techniques in one fell swoop.  Like sharpen, soften, boost color, you name it.  There are plenty of actions on the web, some are free and some cost money.  The two sets from The Pioneer Woman were free, so I thought what the heck!


I have to say that I'm an old dog who doesn't really like new tricks sometimes, so I'm not sure if I love this idea or if I will actually use them a lot.

The first photo of the old pier piling has several actions applied to soften it and to give it that vintage 70's feel.  I think it turned out nicely, so maybe I would use it on certain types of photos.

The water photos above show the differences between a photo with nothing applied and one which uses actions.  The top one is straight out of the camera at dusk, the one below of almost the same thing, just a little tighter shot also has several actions applied.  I used Boost, Slight Sharp, and Edge Burn.  I also like the way this one turned out.


I think I will need a lot more practice using actions, and maybe I'll even go crazy and try a few textures just for fun.  I know lots of other bloggers use these tools with great success.  Kate from Chronicles of a Country Girl always wows me with the photos she applies actions and textures to, so there is hope for me!  And Maria from Dreamy Whites showed us how beautiful her photos can be with Flora Bella Actions today on her blog...click here to see more.

For me the jury is still out.  I will have to see if I like actions or if I just enjoy tweaking each and every photo I take on my own.  Sometimes I'm weird like that!

And now on to the winner of the wonderful towel Giveaway from Lyla at Old Spool Embroidery!


It was lucky #124, Carolyn from Fab Shabby Roses!  Congrats Carolyn, just drop me a line and send me your mailing address and I'll pop them in the mail to you!

I hope each of you have a wonderful weekend and find your own way to unwind and unplug for a few days!